Showing posts with label edibles. Show all posts

Fenton Friday: Bean Stalks

student documentaians
This week in my community garden plot, some student documentary filmmakers came by and took some footage of the gardens. I did a brief interview with them as well. The final product will be under 5 minutes long, so I doubt I'll make the final cut, but it was fun to participate in it. The heat was unbearable and one of the students was overcome by heat exhaustion. She is fine now, but that is a good warning to all of us to take extra precautions in this weather.


Red Okra
My red okra is starting to produce regularly now and my basil is about ready to harvest for making pesto. The zinnias have jumped up -- right on time for my flower class this Sunday at On the Purple Couch.

The beans planted only last week are now six-inches tall. It is really stunning what these little powerhouses can do! I am looking forward to harvesting them in August.

Bean seedlings
How is your edible garden growing this week?

About Fenton Friday:
Every Friday during the growing season, I'll be giving you an update on my community garden plot at the Fenton Street Community Garden just across the street from my house. I'm plot #16. It is a 10 ft x 20 ft space and this is our 5th year in the garden. (It opened in May 2011.)


Fenton Friday: Stolen 'Matos

Everything is looking pretty good in my community garden plot this week. The seedlings have needed some supplemental water and I weeded quite a bit, but otherwise not too much stress. UNTIL... I went by on Tuesday to take photos of the 'Matt's Wild Cherry' tomatoes that were starting to ripen, only to find they were gone.Vanished. Stolen. I hope by a bird or squirrel, but I suspect a fellow homo sapien :-(

It really sucks, as I'm always willing to share (WHEN ASKED!), but these were the first ones of the season and I was really looking forward to take the pics and sharing them with you all!

On a more positive note, a self-sown sunflower at the edge of my plot popped into bloom. Sweet!


I did also get by and cleared out the pea vines to plant 'Kentucky Wonder' beans. Pictured here is a fast-growing beanie-weenie.

How is your edible garden growing this week?

About Fenton Friday:
Every Friday during the growing season, I'll be giving you an update on my community garden plot at the Fenton Street Community Garden just across the street from my house. I'm plot #16. It is a 10 ft x 20 ft space and this is our 5th year in the garden. (It opened in May 2011.)

Fenton Friday: Small-ish Garlic Harvest

Garlic cleaned and ready to be cured
This week at the community garden plot started off hot and dry and then the rains came and it cooled off for a bit -- now it is in our usual hot, humid, and pop-up storm pattern.

The garlic foliage was browning so the interns and I dug it up. The bulbs are about half the size of last year's crop -- nothing to brag about, but not awful. Thy are hanging now in my sunroom to cure for a couple weeks.

Intern John's watermelon seeds did not really germinate, so we put in sweet potato slips in that spot instead. Intern Jacqueline's cucumber seedlings are doing just fine and we thinned them back to the strongest two.

I also planted 3 each -- Nicotiana seedlings, 'Genovese' Basil, and 'Black Pearl' Ornamental Peppers. About half of my cut-flower seeds have not germinated so I may go in and re-space out some of the flower seedlings that did come up and add a few new seeds.

The strawberry crop has ended and the peas have petered out. I'll pull the latter's vines this week and put in green beans and some 'Baby Boo' pumpkin seeds.

Has is your edible garden growing this week?

About Fenton Friday:
Every Friday during the growing season, I'll be giving you an update on my community garden plot at the Fenton Street Community Garden just across the street from my house. I'm plot #16. It is a 10 ft x 20 ft space and this is our 5th year in the garden. (It opened in May 2011.)

Fenton Friday: Baby Veg


cherry tomato
This week in my community garden plot, I continued to pick a few handfuls of snap peas and strawberries. I put in some new bark chips for the pathways and continue to battle the nastiest of weeds -- Canada thistle!

The tomatoes, peppers, and okra are flowering and forming tiny fruits -- promises of good things to come.

The cut-flower seeds I planted are coming in very sporadically, I will give them another week and may re-plant some sections.

Meanwhile, the cucumber and watermelon seeds the interns planted last week are already making their appearances.


red okra
A fellow community gardener gave me some sweet potato slips so I will clear a space for them next.

How is your edible garden growing this week?


cucumber seedlngs


About Fenton Friday:
Every Friday during the growing season, I'll be giving you an update on my community garden plot at the Fenton Street Community Garden just across the street from my house. I'm plot #16. It is a 10 ft x 20 ft space and this is our 5th year in the garden. (It opened in May 2011.)

Fenton Friday: Suddenly Scapes

Every year the sudden appearance of the Garlic Scapes baffles me. One day, not a hint of them. The next day, there they are -- all these pig tails full of springy-energy.

I cut them today and I think the garlic bulbs themselves are very close to be ready for harvesting soon as well.

The torrential rains have stopped. Followed by days of high winds that are desiccating anything I have still in pots waiting to go in the ground. I have spending most of my "gardening time" watering pots of seedlings.

I did finally manage to get the cut-flower seeds mapped out and planted. The two new interns planted cucumber and watermelon seeds as well.

The strawberries are still producing very well and the peas are hanging in. I see an okra forming on one of the still-small plants along with some tiny tomatoes emerging.

How is your edible garden growing this week?

About Fenton Friday:
Every Friday during the growing season, I'll be giving you an update on my community garden plot at the Fenton Street Community Garden just across the street from my house. I'm plot #16. It is a 10 ft x 20 ft space and this is our 5th year in the garden. (It opened in May 2011.)

Strawberries: You Can Grow That!

Sweet. Luscious. Juicy. No wonder this fruit is blushing! Strawberries are one of the most loved edibles. They can be eaten straight from the plant; used in jam or dessert recipes; or frozen and enjoyed in mixed drinks and shakes throughout the year. Not only is it versatile in the kitchen, it is also amazingly easy to grow. If you attempt no other edible this year, we encourage you to at least give this berry a try.
   Strawberry growing can be as simple as a pot on your patio or hanging by your back door. Set aside a 4x4 foot bed in your garden and you can have strawberry crops for the next few years.
   Strawberries grow best in a raised bed of well-drained soil. Mix in plenty of organic materials. If you put a wood frame around the bed, ensure that the wood is not treated with harmful chemicals that will leach into your planting.
   Plant strawberries in full sun during the spring. The first year may not yield much of a crop. Strawberry plants send out runners. Pinch them back or guide them back into the bed. Some even recommend pinching off all flowers and runners during the first year to get even bigger crops the following year.
   The plants peak at three-years-old. So buy new stock every few years to replenish them.
   Put the new, bare-root plants in so the crown is just resting at soil level with the roots gentled fanned out beneath the surface.
   They need only about one inch of water per week and are prone to root rot, so don't over do it.
   There are two main kinds of strawberries: ever-bearing and June-bearing. As per their names, ever-bearing and June-bearing fruit at different times. June-bearing from late-May to mid-June, while ever-bearing can have several waves of berries throughout the summer. Select June-bearing if you want one large crop for making jams or freezing. Choose ever-bearing if you want to throw some fresh berries in your cereal bowl every few days.
   Relatively disease-free, compared to other fruits you may grow, they are plagued by a few pests. Most notably slugs and birds.
   To combat slugs, sprinkle around the beds with Sluggo (iron phosphate), which is safe for use around edibles.
   For birds, put some shiny, moving objects nearby. For instance, used CDs hanging by strings on your fence or trees. You might also consider investing in some bird netting to cover the beds as the fruits ripen.
   In the fall, mulch the strawberry bed with straw (not hay!) or other materials such as pine needles to insulate the plants over the winter. Remove the mulch again in spring.
   The strawberry flowers themselves are pretty. Usually white or light pink, some varieties are grown more for their decorative value than for their fruit. The 'Pink Panda' aka Strawberry Potentilla is especially attractive with its bright pink blooms.
   Strawberry plants also make good border plantings. They stay low and fairly tidy. The runners are easy to pull if they go astray. (If you choose Alpine varieties, you will not have a runner problem.) So don't hesitate to plant a row of strawberries on the front edge of your flower beds for a sweet treat every time you pass by.

Advice from Local Growers

According to Larriland Farms, the berries are very consistent in their ripening schedule — coming exactly 28-30 days from bloom to harvest.
    Lynn Moore of Larriland says some of their best customers are gardeners. They find that the time and effort it takes to invest in growing the plants is just not possible with a full work schedule and busy life, so they visit pick-your-own farms for their annual strawberry “fix.” Lynn says she rearranges her life around her plants schedule. “They need what they need when they need it,” she explains. “And most gardeners are just not going to keep that kind of schedule.”
   Butler’s Orchard reports that June-bearing varieties do the best in our region. The intense summer heat can damage the ever-bearing varieties. Besides pick-your-own berries, Butler’s also sell the plants themselves including: Earliglow, Northeaster, and Darselect.
    Strawberries are expected to be in season for picking at all area pick-your-own farms starting in late May into June. Call first (or check their web sitrs/Facebook pages) to see if the berries are ripe before you make the trip.


All who are involved with You Can Grow That! (YCGT!) believe that plants and gardening enhance our quality of life. We want people to be successful with what they grow and to become more aware of the many gifts that horticulture brings. Find out more at http://www.youcangrowthat.com/.

Fenton Friday: Progress Stalled

peas growing
Not much progress at my community garden plot this week. Been swamped with garden talks and writing deadlines. I did stop by today and cleared out a few more weeds enough to see that my garlic planted last fall was up and looking good.

Also found what looks like a broccoli plant that re-seeded itself? Could also be a cabbage or cauliflower -- anyone really good at identifying brassicas?

How is your edible garden growing this week?

About Fenton Friday:
Every Friday during the growing season, I'll be giving you an update on my community garden plot at the Fenton Street Community Garden just across the street from my house. I'm plot #16. It is a 10 ft x 20 ft space and this is our 5th year in the garden. (It opened in May 2011.)  
cabbage? broccoli?
garlic up

Asparagus: You Can Grow That!


Nothing says, "SPRING!" like fresh Asparagus. With no real work on my part, I was able to get a decent harvest of Asparagus this week from my community garden plot. The only thing this perennial vegetable really requires is patience.

Having to hold off on harvesting for three years from the initial planting date was a real test of my will power, but the wait is worth it. They are so tender fresh from the garden that I do not bother to cook them in any way, I just snack on them raw.

To plant them, buy Asparagus crowns via mail-order or in bags from your local garden center. Plant them in a trench about 6-12-inches deep and a foot wide in a sunny spot in your garden. Add in some organic compost when re-filling the hole and then keep the area well-mulched.


Asparagus baby in trench
I let strawberries encroach in my Asparagus bed as their surface-runners don't really interfere much with the Asparagus roots, but you really should keep it weeded and free of interloping plants.


Other than that, the only other thing I do is tie-up the long Asparagus fronds in the summer and fall with a bungee cord as they like to flop over into the pathways. These get cut back and composted at the end of the growing season.


Asparagus spears in strawberry patch

If I had to do it all over again, I definitely would have started off the first year in my garden plot with Asparagus, instead of waiting for year two. I also would have planted much more of it. I started with only three rootlets and I am harvesting a decent amount, but I am greedy for more, more, more!


All who are involved with You Can Grow That! (YCGT!) believe that plants and gardening enhance our quality of life. We want people to be successful with what they grow and to become more aware of the many gifts that horticulture brings. Find out more at http://www.youcangrowthat.com/.

Video Wednesday: Pea Planting Tips


After this long, harsh winter, we are all eager to get out and see anything green. Now is the perfect time to get acquainted with and grow the numerous early season crops we can cultivate in the Mid-Atlantic’s cool, wet spring months of March and April.

Many delectable edibles prefer the early spring mild weather days and practically melt when our hot, humid summers arrive. Tradition says to plant peas on St. Patrick’s Day and this week is a perfect time to set up a vegetable patch or planting boxes full of cool-season edibles. Watch this video for some easy pea planting tips to get you started.


Kale: You Can Grow That!

Kale is "king" according to nutritionist and trendy chefs alike. This frilly cabbage cousin is packed full of nutrients and antioxidants. Kale is a versatile green and can be used as a spinach substitute in virtually any recipe.

In the current issue of Washington Gardener Magazine,
our "EdibleHarvest" columnist Elizabeth Olson provides the following advice for growing kale.
Growing requirements for kale are very similar to those of cabbage. Gardeners who want to grow kale in spring should either purchase transplants in early to mid-spring or start seeds indoors about four to six weeks before the last expected frost date. 

Seeds for autumn-harvested kale should be started in mid-summer and the plants should be installed in the garden by mid-September.


   Be sure to harden off young plants before transplanting them to the garden and do not crowd them to ensure good air circulation. Space them based on usage (such as harvesting whole young plants or growing them to maturity and harvesting leaves as needed) and the recommendations for each cultivar. 


    Kale grows best in full sun. The soil should drain well and be well-worked and amended with compost. Fertilize the plants with an organic vegetable fertilizer. A consistent moisture level in the soil is necessary for the highest-quality leaves; supplement rainfall with a soaker hose that is installed soon after planting. Keep the kitchen garden well-mulched and free of weeds.  
   The plants should be covered with a floating row cover to protect them from flying insects. It is challenging to extract pests that get into the leaves, especially the ruffled ones.
Read more about growing kale along with a few kale recipes in the February 2016 issue of Washington Gardener Magazine.


All who are involved with You Can Grow That! (YCGT!) believe that plants and gardening enhance our quality of life. We want people to be successful with what they grow and to become more aware of the many gifts that horticulture brings. Find out more at http://www.youcangrowthat.com/.

Arugula: You Can Grow That!

Guest Blog by Joelle Lang


On September 30, the first day of my internship with the Washington Gardener Magazine, I was confronted with a difficult decision — what did I want to grow? As part of my internship, I was to plant something and monitor its growth over the course of the semester. While I can’t remember what my options of seeds were that day, I do remember that I chose to plant arugula because I use it at least four times a week in salads and was excited to be eating something I planted from scratch.


I planted the arugula seeds that day in editor Kathy Jentz’s community garden plot in the ground and in a raised pot. I planted two longs rows in both spots, sprinkling the seeds up and down, covering them with some soil, watering them with a little bit of water and hoping for the best. 

I checked on the seeds one week later on October 7 and was extremely happy to see that they actually began to sprout. The plant grew faster in the ground than in the pot. I held off on cutting them just yet, so they could grow a bit taller.

The next time I checked them on October 19, I was pleased again at the rate of their growth. Once again, I held off on cutting the plant, but I did nibble on some leaves and it was delicious!

I was finally able to cut leaves from my plants on November 2 because of the rapid rate at which it was growing. I did note that the container plants grew at a slower pace than the ones in planted directly in the soil. I made myself an amazing arugula salad for dinner and bragged about my green thumb to my friends and family.

I came back to cut the plants one week later and the plants in the soil had re-grown to an impressive height! I cut those down and enjoyed another salad and bragging session. However, the container-grown arugula continued to lag slightly behind.

I returned to my plants on November 18 to find that the container plants began to sprout dark purple leaves and tasted a little peppery.

After experiencing some rain and gloomy weather, I checked my plant again on December 14 for the last time and saw that the in-ground plants grew enough to make another nice salad and the container plant had also filled in — though they grew more slowly and showed purple and red leaves. I cut both sets of plants back and said a tearful goodbye. I will definitely plant arugula in the future because of how simple it was to care for and how leaves sprouted and re-grew so quickly.


About the Author 
Joelle Lang, a senior at the University of Maryland, College Park, is a multi-platform journalism student in the Philip Merrill College of Journalism. This past autumn, she was also an editorial intern for Washington Gardener Magazine.


All who are involved with You Can Grow That! (YCGT!) believe that plants and gardening enhance our quality of life. We want people to be successful with what they grow and to become more aware of the many gifts that horticulture brings. Find out more at http://www.youcangrowthat.com/.

Happy Thanksgiving!

The broccoli took for-ev-er to form this little head -- but the green beans are still producing in my community garden plot! How is your garden growing today? Is anything you grew part of your Thanksgiving feast today?

Fenton Friday: Closing out the Season

While this week has been mercifully mild, it is coming to the end of the official growing season and we are to have our individual plots cleared out and cleaned up by November 1. We can still continue to grow crops through the winter, if we wish, but many do not at my garden. A few have set up row covers, but mostly as I walked around today, I saw emptied-out beds and a few with freshly sown cover crops.

I have been working this week to pull out the last of the tomato vines and annual flowers (pictured below). My green beans are still producing well, so I'm leaving them up until the last possible second.

Over-wintering in my plot are:
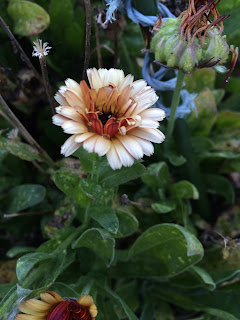
- Calendula (pictured at top)
- Asparagus
- Strawberries
- Garlic
- Chives
- Arugula
- Carrots
- Cauliflower
- Broccoli
- Parsley


This will be my last Fenton Friday report for 2015. Check back in around mid-March 2016, when I plan to kick off the new growing season -- weather-dependent, of course.

 How is your edible garden growing this week?

About Fenton Friday:
Every Friday during the growing season, I'll be giving you an update on my community garden plot at the Fenton Street Community Garden just across the street from my house. I'm plot #16. It is a 10 ft x 20 ft space and this is our 4th year in the garden. (It opened in May 2011.) 

Fenton Friday: Arugula Seedlings Up

The Arugula seeds we planted are all coming up now. I tasted one tiny seedling and it was very nice. I will give it another week or so until thinning them to take more for eating.


Our big community garden clean-up session is tomorrow and I hope to get most of my plot cleared up -- especially the tomato vines are we are due to be hit by a frost/freeze this weekend.


Our cistern is also closing up for the season this week, so in order to have any nearby water for my cool-season edibles, I will be bring in over 20+ kitty litter containers that I have saved up for this purpose. We will drain the cistern into them and line them up for communal use,


 How is your edible garden growing this week?

About Fenton Friday:
Every Friday during the growing season, I'll be giving you an update on my community garden plot at the Fenton Street Community Garden just across the street from my house. I'm plot #16. It is a 10 ft x 20 ft space and this is our 4th year in the garden. (It opened in May 2011.) 
 

Popular Posts