Showing posts with label DIY series. Show all posts

DIY: Eggshell Seed Pots

Guest blog by Daisy-Nelly Nji


If you are a person who is conscious about the environment, but would still like to take on an easy gardening task this is they DIY for you.


Materials
·         Eggshells
·         Egg carton
·         Potting soil & spoon
·         Awl/needle/pin - anything long and sharp
·         Knife
·         Seeds

Step 1: Prepare the eggshells
Instead of discarding eggshells that you have used, keep them in a carton to do this task and be eco-friendly. Carefully crack the top third of the egg. You can do this by tapping the egg on the edge of a bowl, or tapping with a sharp knife. Empty out yolk from the eggshells and wash them out well. You can also put in the microwave for a minute to kill any potential pathogens.

Step 2: Add drainage
Make a hole that will provides drainage, so the roots of your plant don't drown. Take the empty eggshell, and poke one hole in the very bottom with your sharp object such as a pushpin. 

Step 3: Add potting soil
Using a small spoon, fill the eggshell with moist potting soil.

Step 4: Add seeds
Think about the amount of light you have available in your home and garden, and use seeds that will thrive in these conditions. Plant your seeds according to directions on the seed package.

Step 5: Enjoy
After you have planted the seeds, you can simply put the eggshell back into the carton. The carton provides a stable base with room for drainage, is further re-used and r-cycled, and it also looks darn cute.


About the Author

Daisy-Nelly Nji is a senior journalism student at the University of Maryland. She is a multi-platform journalism major in the Philip Merrill College of Journalism. This spring, she is an editorial intern at Washington Gardener Magazine.

This is a monthly guest blog series on DIY projects for the beginning home gardener. Look for the other installments in this DIY blog series by putting "DIY" in the search box here at washingtongardener.blogspot.com.

DIY: Garden in a Glass

Guest blog by Daisy-Nelly Nji
 
If you are someone who’s always been interested in gardening but never had the space for it, this DIY project is for you. By building your own terrarium, you too can grow luscious plants in your office or home. The best part is you don’t need very many materials to start your garden and maintaining it is a breeze. Below are some simple instructions on how to get this garden for yourself.

Materials:
1 Clear Glass or Plastic Container
Pebbles
Potting Soil
Moss
Cacti/Succulents

Step 1: Place about an inch of pebbles at the bottom of the container

Step 2:  Add a light layer of moss on top of the pebbles (this will help keep the soil from settling into the pebbles)

Step 3: Add about 2-3 inches of potting soil on the top of the moss

Step 4: Remove the Cactus/Succulent from its container and plant it in the soil (depending on how big your container is you can plant and arrange numerous cacti as desired)

Step 5: Place the Succulent in direct sunlight and lightly water the base of the plant every two weeks as you notice that the soil dries out

Tip: Change the size of the container every year or so, in order to accommodate your plants growth. 

About the Author

Daisy-Nelly Nji is a senior journalism student at the University of Maryland. She is a multi-platform journalism major in the Philip Merrill College of Journalism. This spring, she is an editorial intern at Washington Gardener Magazine.

This is a monthly guest blog series on DIY projects for the beginning home gardener. Look for the other installments in this DIY blog series by putting "DIY" in the search box here at washingtongardener.blogspot.com.
 

DIY: Starter Pots


Guest blog by Daisy-Nelly Nji

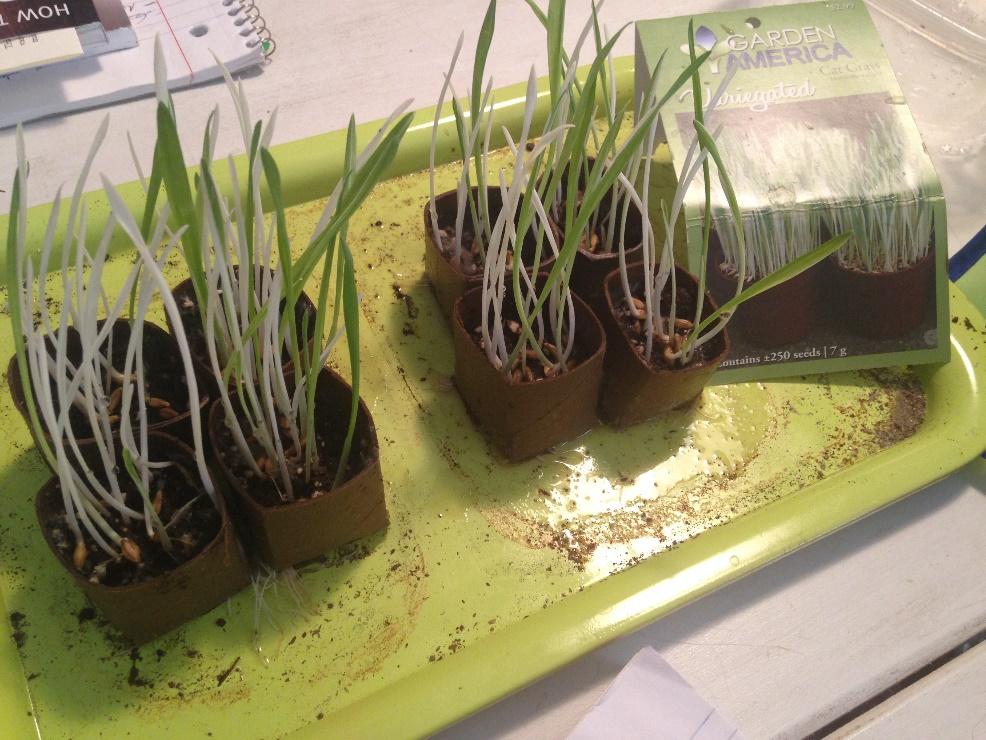
These easy seed-starting pots can be made by the dozen and can be directly planted in soil after the seeds have sprouted as the paper rolls will decompose.

Materials: 
Empty toilet paper or paper towel rolls
Watering can
Seeds (we used cat grass)
Tray
Clear, plastic container
Soil-less seed-starting mix
 
Instructions:

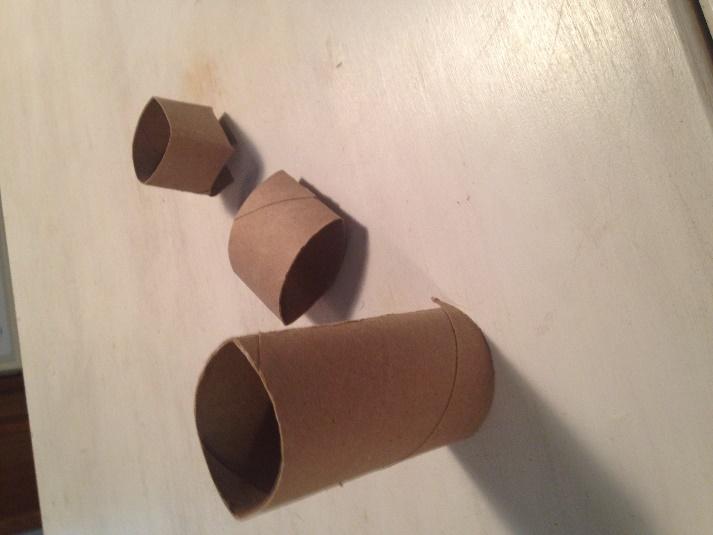
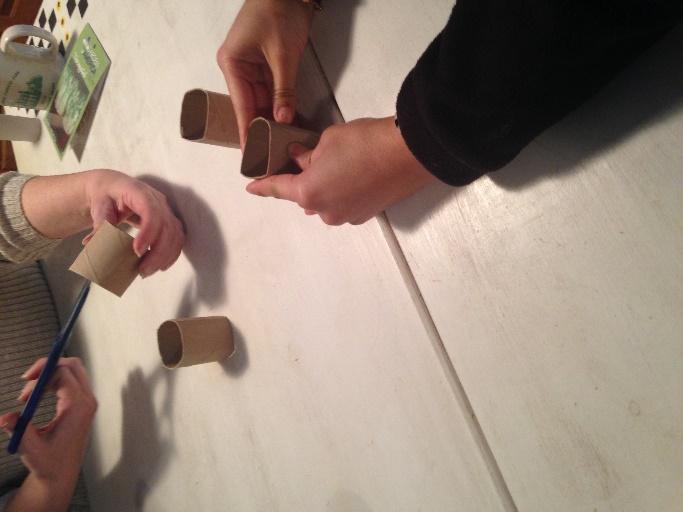
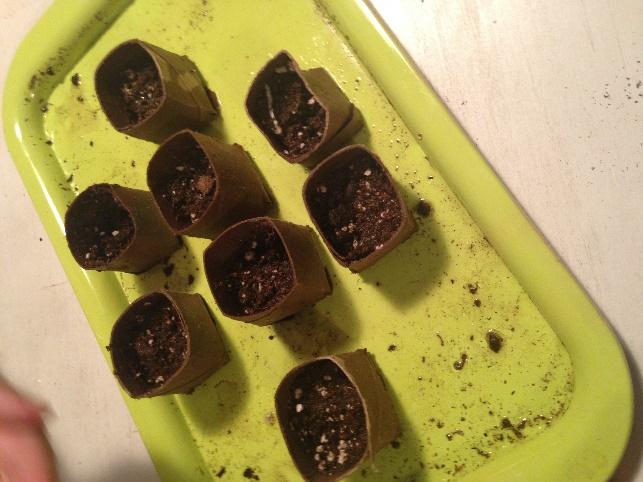
Step 1: Fold the roll into a square. By first folding the roll in half one way. Then, folding it in half the other way.
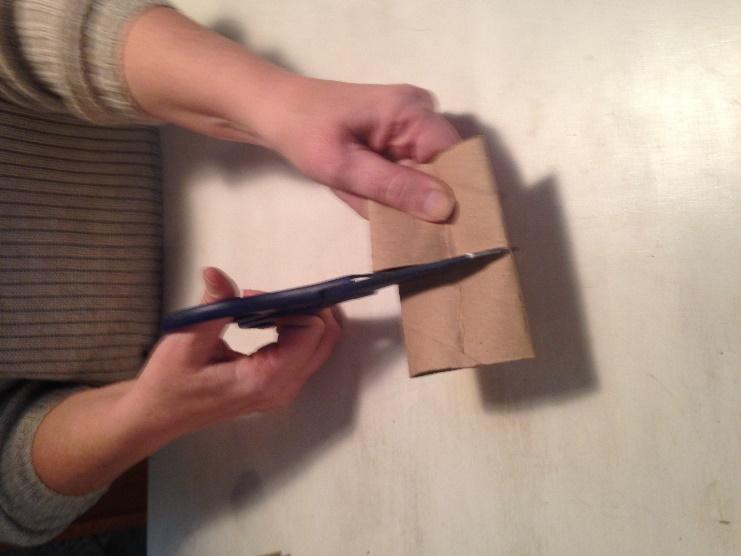
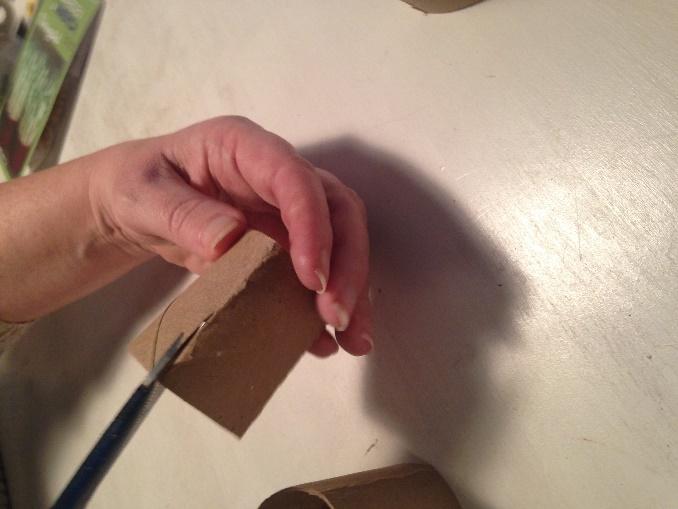
Step 2: Cut the toilet paper roll in half. Fold the roll in half one way and make a 3/4-inch cut, then fold the roll in half the other way and make another 3/4 inch cut. You should have 4 cuts in total on the bottom of your roll. Repeat this step on the other roll.
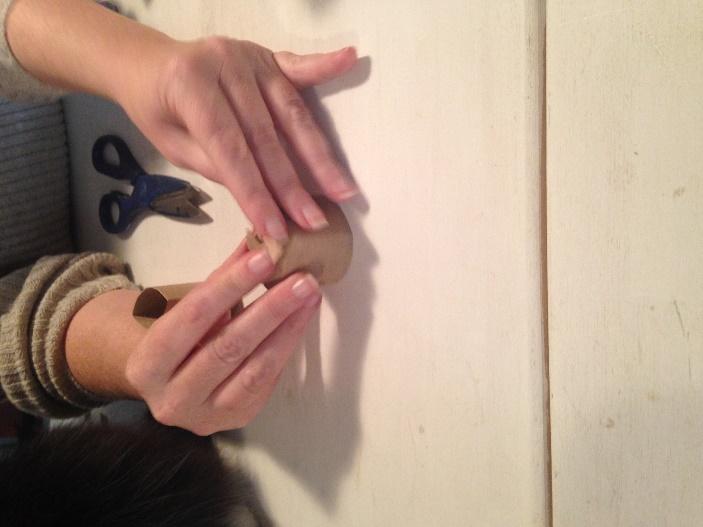
Step 3: Fold the bottom flap down first, then fold the left flap down, overlapping the bottom flap, then fold the top flap down, overlapping the left flap. Now here's the tricky part. Fold the right flap under the bottom flap and over the top flap. This holds the pot together. Repeat this step on the other pots. 
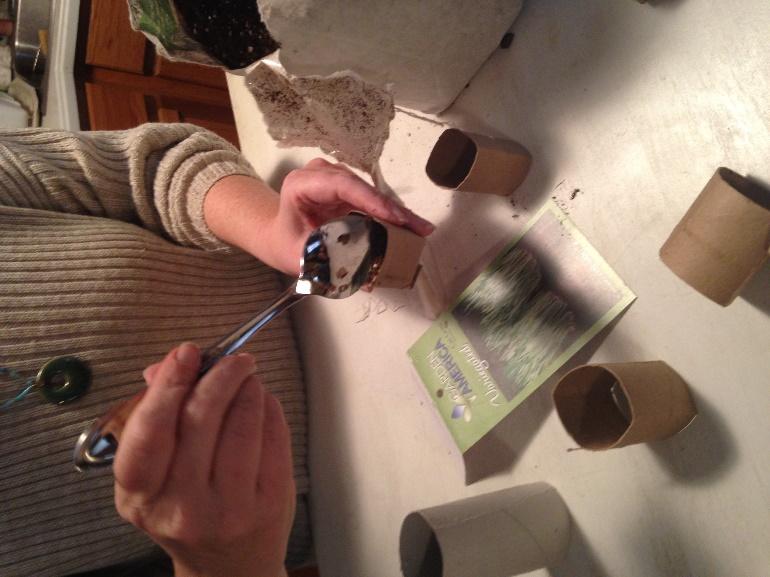
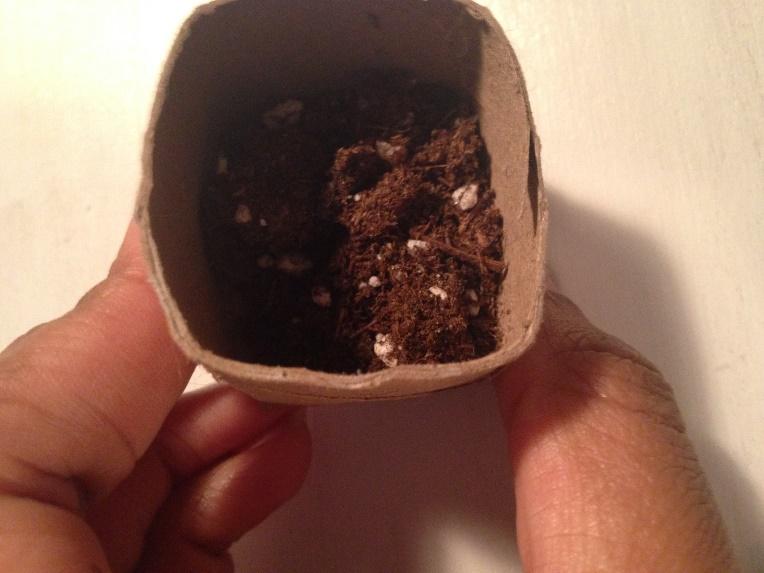
Step 4: Fill the pot halfway with soil.
Step 5: Soak the soil with water. Then press out the excess water with your fingers.
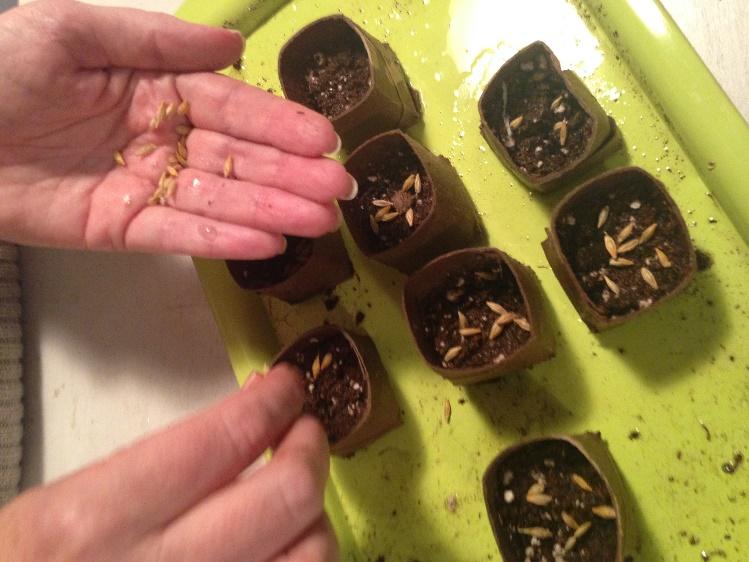
Step 6: Add 2-3 seeds to each pot
Step 7: Add a tiny bit more soil to cover the seeds. 
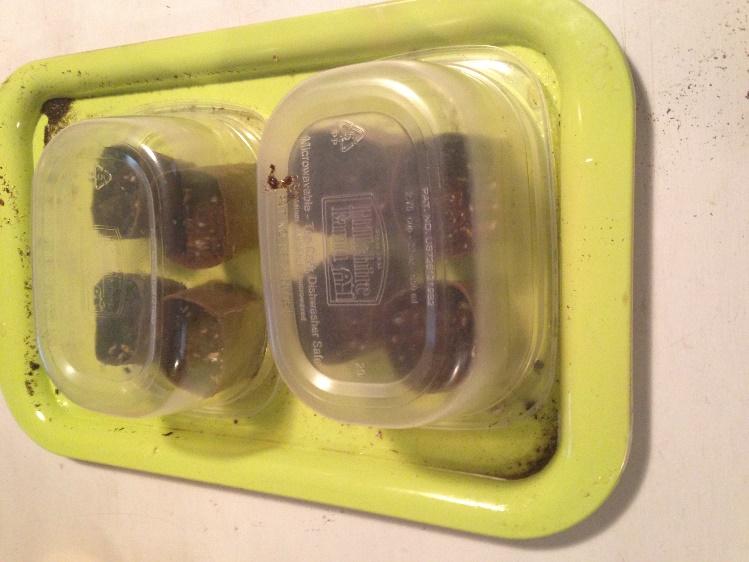
Step 8: Place the pots on a tray and put a plastic bowl on top of the pots to seal in moisture.
Step 9: Put in a sunny window. Check on them daily. Watering the seed pots as needed. After about two weeks your plants should begin to sprout and grow. 
Step 10: Remove the plastic bowl and continue to care for the seedlings until they are ready to transplant to a bigger container or outdoors. Enjoy!


About the Author

Daisy-Nelly Nji is a senior journalism student at the University of Maryland. She is a multi-platform journalism major in the Philip Merrill College of Journalism. This spring, she is an editorial intern at Washington Gardener Magazine.
 
This is the re-boot of our monthly blog series on DIY projects for the home gardener. Look for the other installments in this DIY blog series by putting "DIY" in the search box here at washingtongardener.blogspot.com.

DIY: Easy Moss Wreath

Guest blog by Gaby Galvin 

While wreaths look complicated, they’re actually quite simple to make. Follow these quick steps and make your own moss wreath, using foliage from your own garden and yard. This moss wreath can be used for winter holiday decor and beyond.
 
Supplies:
Straw wreath
Pincushion moss (grows in dense clumps in moist yards)
Sheet moss (grows in carpet-like mats in moist, shady yards)
Glue gun
Floral pins
Ribbon
Embellishments from your garden (shown here with ferns)

Instructions:
  1. Brush dirt off your moss with a chip brush, making sure not to tear it too much.
  2. Use floral pins to attach the pincushion moss to the straw wreath. Handle it carefully and use it generously so it looks full and plump. Cover most of the wreath this way.
  3. Fill any ridges in the wreath with sheet moss. Make sure you aren’t using any dried-up pieces. Use a glue gun to keep it down, covering the floral pins.
  4. Add embellishments as you like, including inserting live plant material. Tie a ribbon at the top of the wreath, if desired.

This easy-to-make wreath can last for several months depending on how well you care for it. I recommend hanging it outside on a front door or on a fence, so you can easily water it with no mess. It is important to water the wreath if you want it to last a long time as sheet moss can dry out if you don’t! Happy New Year!
About the author:

Gaby Galvin is a Washington Gardener Magazine summer 2015 intern who is studying multiplatform journalism at the University of Maryland. She does some gardening at home in Davidsonville, MD, with her mother and grandparents. 
 
This is the last post in this blog series on DIY projects for the home gardener. Look for the other installments in this DIY blog series by putting "DIY" in the search box here at washingtongardener.blogspot.com. 
 

DIY: Cinn-Apple Ornaments


Make these leather-like cookies for gift tags, holiday tree ornaments, or to hang from a cabinet knob.


Ingredients:
5 oz. cinnamon
1 ½ cups flour
20 oz. applesauce


Optional:
Acrylic paints
Glitter
Ribbon or Wire


Put cinnamon, flour, and applesauce in a large bowl, blend with a spoon. Knead mixture into a ball. It should have the consistency of a thick cookie dough or Playdough. It should roll out without cracking. If it is too dry, add more applesauce, 1 tablespoon at a time. If it is too moist, add more flour, 1 tablespoon at a time.

Divide dough into two sections and roll each section into a 1/4 inch sheet. Sprinkle the surface, rolling pin, and your hands with flour when working with the dough. Cut into shapes with cookie cutters. Punch a hole in each for hanging using a skewer. You can also press into the cookies with letter stamps or other designs.

Slip ornaments onto baking sheet with a spatula and bake at 200 degrees for 20 minutes. Check frequently. If ornaments bake too long, the edges will curl. Remove to a wire rack and cool. Let them fully dry for a day or two. They will lighten in color a bit as they dry. If there is excess flour on a cookie, use a pastry brush to sweep it off.

You can leave them as is or decorate them with glitter or acrylic paints. Store them after the holidays in a wax paper-lined box in a cool, dry place.


Note that these are not intended for eating, but will not harm you if you do.
This makes about 60 small ornaments. 
Adapted from a Cooks.com recipe.
Tip: You can buy bottles of cheap cinnamon at the dollar store.
Bonus: your home will be filled with cinnamon-scented goodness for days!


This is the fourth in a 6-part series on DIY projects for the home gardener. Look for the next installments in this DIY blog series on the 1st of each month (through January 2016) here at washingtongardener.blogspot.com.

DIY: Make Your Own Birdbath Container Garden

Guest blog by Gaby Galvin 


Want to draw in birds to your garden while still making something pretty and useful? Try out this simple birdbath that doubles as a small container garden. The best part is, you can use it year-round, going from a full birdbath to this cool hybrid.

Supplies:
17-inch urn
12-inch poly urn
10-inch terra-cotta saucer
Craft paint
Flowers
Potting mix

Instructions:
  1. Drill about five holes in the bottom of the larger urn to allow for drainage. These should be evenly spaced, but all closer to the center of the urn.
  2. Paint your urns and saucer whatever color you like. Make sure the paint you use is safe for the birds. Wait for the paint to dry.
  3. Place the smaller urn upside down in the bigger one and glue it down.
  4. Fill the bottom urn with potting mix and plant your flowers. I recommend smaller ones like Alyssum, Violas, or Lobelia so they don’t become too overgrown.
  5. Place the saucer on top of the smaller urn and glue it down. Add some water for the birds and you’re done!

Make sure to place your new birdbath somewhere accessible for the birds – probably an elevated space outside. With this two-in-one project, you’re sure to hear birds chirping and see beautiful flowers you might not normally think to have them. Enjoy!


About the author:
Gaby Galvin is a Washington Gardener Magazine summer 2015 intern who is studying multiplatform journalism at the University of Maryland. She does some gardening at home in Davidsonville, MD, with her mother and grandparents. 
 
This is the fourth in a 5-part series on DIY projects for the home gardener. Look for the next installments in this DIY blog series on the 1st of each month (through December 2015) here at washingtongardener.blogspot.com. 
 
Image sources: Lowes.com


Popular Posts